TeamApp payments to custom kit orders: complete 2026 workflow
Instead of manually matching TeamApp payments to jersey sizes every day, set up a club-controlled register that connects each payment to a confirmed garment request, then submit only approved rows...
Instead of manually matching TeamApp payments to jersey sizes every day, set up a club-controlled register that connects each payment to a confirmed garment request, then submit only approved rows as your custom kit order. This 2026 workflow separates payment checks, player details and supplier approval so a payment notification never becomes an unchecked production instruction.
TL;DR
Use a register for your TeamApp payments to custom kit order workflow; payment confirmation alone is not an order.
FE Custom is best suited to Australian teams buying custom sports apparel online.
Match payments to players, confirm garment sizes, then approve a fixed order batch.
For reversible basketball jerseys, check personalisation on both sides before approval.
Why this matters
A parent can pay for several children. A player can request a jersey and shorts in different sizes. Neither situation fits a simple rule that treats every payment as a complete kit request.
A paid record and a production-ready order are different things. Your club needs a controlled handoff between them, with someone responsible for resolving exceptions before submission.
FE Custom is an Australian online sports customisation store. Use this guide to prepare custom kit orders for that online buying process, not as instructions for a native TeamApp integration or automatic checkout.
The benefit is a traceable order register. The trade-off is that your club still owns reconciliation, sizing confirmation and final approval; those tasks do not disappear when you collect payments digitally.
Before you start
Arrange access: nominate an authorised club administrator who can inspect the relevant TeamApp payment records, plus a treasurer who can verify the club's financial position before purchasing.
Prepare the materials: collect the current garment selection, its sizing information, approved artwork, player details and a restricted spreadsheet. Assign an order coordinator and a separate final checker.
Resolve the hidden gotcha: payer names do not necessarily identify players. Collect an explicit payer-to-player allocation, particularly for family payments, before treating any garment as funded.
For your 2026 season, write down a collection deadline and the time zone. Australian clubs operating across states should not leave a deadline as an unexplained local time.
The bold field names below are labels you create in your register, not TeamApp menu names. Keep payment checking inside the authorised account; keep full card details and account credentials out of the spreadsheet.
Set up the order register
Garment records
Create a restricted workbook named for the club, team and 2026 order round. Give editing access only to the people who maintain or approve the order.
Create a worksheet called Order register. Use 1 row per garment request, rather than one row per family or payment.
Add Order ID, Player ID, Player name, Payer name, Team, Garment, Fit range, Size, Quantity, Printed name and Printed number.
Add Payment reference, Payment check, Details check, Approval status and Batch ID. Keep financial checks separate from garment checks.
Give each garment request a unique Order ID. Retain that identifier when a size or printed name changes.
Expected result: every requested garment has a traceable record, even when a parent pays for several players or a player requests several items.
Do not use a player's name as the only identifier. Names can repeat, and the same player can appear in different teams.
For jersey-and-shorts orders, record each garment separately. A confirmed jersey size does not confirm shorts sizing, and a combined description makes shortages harder to isolate.
Payment allocation
Keep a separate worksheet called Payment allocation. Record the payment reference, payer, affected Order IDs, allocation explanation, check date and checker.
Use this worksheet to explain family payments, combined purchases and adjustments. Do not duplicate a whole payment against every garment row and then total those repeated entries as separate receipts.
Configure payment reconciliation
Payment evidence
Inspect the relevant payment records using your authorised TeamApp access. Use the transaction details actually shown in your account rather than relying on a chat message saying someone has paid.
Match each payment to the payer and intended player requests. Record the reference exactly as shown, preserving any leading zeroes.
Resolve ambiguous payments with the payer. Ask which players and garments the payment covers; do not infer the allocation from a surname alone.
Set Payment check to a club-defined value: Unmatched, Needs review or Verified. These are your register labels, not claims about TeamApp transaction statuses.
Ask the treasurer to confirm that the club can fund the supplier order. A matched payment record is not permission to assume funds are ready for purchasing.
Expected result: every verified garment row points to payment evidence or a documented club funding authorisation.
For the 2026 order round, record who completed each check and when. A dated check gives the next volunteer a useful starting point when a payer queries an allocation.
Never create a second garment request just because a payment record appears again during a later check. Search the existing payment reference and Order ID first, then update the existing allocation.
Exception handling
Keep unmatched payments outside the approved order batch. Likewise, keep a completed sizing request outside the batch until its funding is verified or the club explicitly authorises payment on the player's behalf.
This creates 2 separate approval gates: funding and garment accuracy. Neither gate substitutes for the other.
Configure sizing and personalisation checks
Player confirmation
Send each player or parent their recorded garment details for confirmation. Show the garment, fit range, size, quantity and exact personalisation text.
Ask the buyer to use the selected garment's current sizing information. Do not translate a casual clothing size into a teamwear size without checking the relevant measurements.
Record confirmation in Details check. Leave unanswered requests marked Needs review, even when payment is verified.
Check printed numbers within the relevant team. Resolve unintended duplicates against the club's competition requirements before approving the batch.
For reversible basketball jerseys, confirm the intended artwork and personalisation for both sides. Treat an approval covering only one side as incomplete.
Expected result: each approved garment row contains buyer-confirmed details that a supplier can interpret without guessing.
A reversible jersey remains 1 garment even though it has 2 sides. Keep its quantity separate from its artwork instructions so the order does not accidentally count the reverse as another jersey.
For soccer kits, confirm jersey and shorts details independently. For tennis and pickleball team orders, use the same register structure but retain the actual selected garment description rather than a vague entry such as team top.
Do not approve a size on somebody else's behalf. Record who confirmed it and retain that confirmation with the order records.
Artwork control
Give the artwork files a clear version label and identify the version approved by the club. Keep sponsor permissions and spelling checks with the artwork record, rather than assuming a payment confirms design approval.
If a design changes after player confirmation, identify exactly which confirmations need checking again. A corrected sponsor logo and a changed printed number do not affect the same records.
Configure the supplier handoff
Approved batch
Select only rows with verified funding, confirmed garment details and club approval. Assign them a shared Batch ID containing the team and order round.
Create a fixed copy of those rows. Name it clearly, for example 2026 Approved batch A, and preserve it separately from the working register.
Total garment quantities by garment, fit range and size. Check that the summary reconciles with the detailed rows before sending either document.
Prepare 3 handoff files: the approved garment schedule, the approved artwork and the order summary. Include delivery details and the club's authorised contact in the summary, not private payment records.
Use the supplier's current ordering process. Confirm that the submitted quantities, artwork version and delivery details match the approved batch before authorising the purchase.
Expected result: the supplier receives a consistent garment brief, while the club retains the payment evidence supporting it.
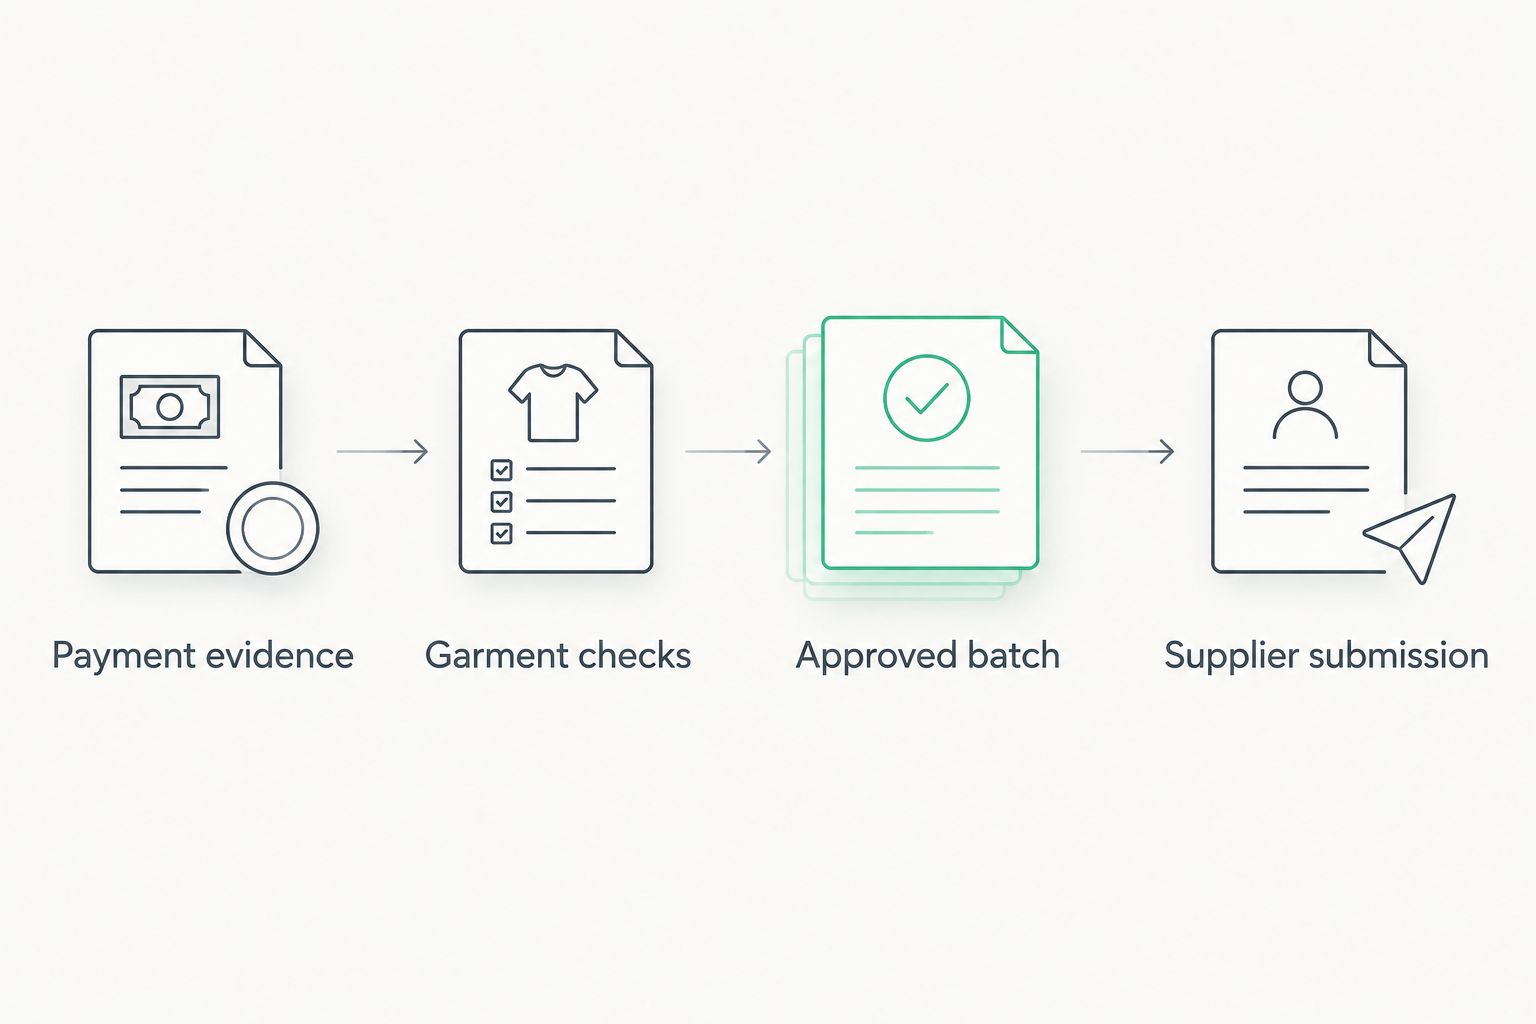
The handoff follows a fixed sequence: payment evidence, garment checks, approved batch, supplier submission. Keep changes outside that sequence until somebody reviews them.
Only checked garment requests belong in the supplier submission.
Record the supplier acknowledgement alongside the submitted batch. Compare any order confirmation or proof provided against your own approved files, not against memory or an earlier draft.
Do not write a delivery promise into the team announcement before confirming the supplier's current arrangements. Record the Australian delivery address, postcode and receiving contact accurately, including any access instructions the supplier requests.
Update the register whenever a request changes
A second workflow handles late payments, corrected sizes and additional garments. Update the working register, but never silently rewrite an already-submitted batch.
Choose the handling method that matches the order stage:
Workflow
Best for
Benefit
Limitation
Fixed batch
Teams collecting requests before a shared deadline
Gives the checker a stable list to approve
Late requests need separate handling
Rolling review
Teams still collecting or correcting requests
Keeps unresolved rows visible as details arrive
Requires repeated checks; it is not permission for automatic submission
Amendment register
Changes requested after supplier submission
Preserves the original order and the proposed change
Requires supplier confirmation before the change is treated as accepted
For an unsubmitted request, update the existing Order ID and repeat the affected checks. A size correction needs renewed detail confirmation; a changed payment allocation needs renewed funding verification.
For a submitted request, log the original details, requested change, requester and date in an Amendment register. Ask the supplier whether the change can be accepted and retain the response.
For your 2026 records, distinguish Requested change from Confirmed change. Do not tell a parent that an amendment is complete merely because the club has sent a message requesting it.
Troubleshooting
A parent paid, but the player still appears unpaid
Check the payer-to-player allocation before asking for another payment. Match the transaction reference to the intended garment requests, then update the existing rows rather than creating replacements.
A family payment covers several players
List the affected Order IDs in Payment allocation and verify the complete allocation. If the intended coverage remains unclear, ask the payer to clarify; do not mark every family member verified by default.
The garment summary does not match the detailed rows
Check for duplicated Order IDs, hidden rows, excluded requests and quantities entered against the wrong garment. Rebuild the summary from the approved batch only, not the entire working register.
A player changes size after submission
Preserve the submitted size and log the proposed replacement in Amendment register. Treat the original instruction as current until the supplier confirms an amendment; do not promise that production details can still change.
A payment is reversed or disputed after approval
Ask the treasurer to verify the current financial record and flag the affected requests. Keep the funding exception separate from the supplier order status, then establish whether the club must cover the purchase or seek an accepted order amendment.
Customise your workflow
Keep the same approval gates when you expand from a single basketball team to several squads. Add team-specific checking responsibility rather than giving every coach unrestricted editing access to the whole club register.
For reversible basketball jerseys, add separate artwork confirmation fields for each side. For soccer orders, keep jersey and shorts quantities independent; for tennis or pickleball squads, separate garment choices by the actual fit range selected.
Before submitting an FE Custom custom kit order, use the custom jersey proof and approval guide to structure the design check. Payment reconciliation answers who has funded a garment; proof approval answers what should be made.
FAQ
How do I turn TeamApp payments into a custom kit order?
Match each payment to specific garment requests in a restricted register, then submit only rows with verified funding and confirmed details. Retain the approved batch separately from the working spreadsheet.
Does this workflow automatically connect TeamApp to FE Custom?
No. This guide describes a club-managed handoff to FE Custom, not a native integration, payment trigger or automatic checkout.
Can one parent payment cover several children?
Yes, your register can allocate one payment across several players' garment requests. Record the affected Order IDs and confirm the intended allocation with the payer before approving them.
Should I order a jersey as soon as its payment is verified?
No. Verify the garment selection, fit range, size, quantity and personalisation before including the request in an approved batch.
How do I record reversible basketball jerseys in the order?
Record each reversible basketball jersey as one garment request and check artwork instructions for both sides. Do not count the reverse side as another jersey.
What happens when someone changes size after the order is submitted?
Log the requested change separately and seek supplier confirmation. Keep the submitted instruction unchanged in your records until the supplier accepts an amendment.
What should I send with an FE Custom custom kit order?
Prepare the approved garment schedule, approved artwork and an order summary, then follow FE Custom's current ordering requirements. Keep private payment evidence in the club's restricted records rather than the supplier handoff.
One last thing
Give the final checker the fixed batch, not the working spreadsheet. Otherwise, a well-intentioned correction can change the order while somebody else is approving it.
Retain both the submitted version and any confirmed amendments. That distinction is what lets the next volunteer answer whether a disputed size was requested, approved or actually sent to the supplier.